Taking and Editing Photos for Instagram

Ahhh, Instagram. We all love scrolling through our feeds, looking at all those yarn and project photos. Everyone's stashes and WIPs and FOs just look amazing.
Too amazing.
How is everyone else knitting so quickly? How can they afford all that yarn? And WHY do their photos look so fantastic?
Rustic. Modern. Ethereal. Cozy. Warm. Inviting. Natural. Exotic. Everyone has their aesthetic.
But how are they doing it?
Before we answer that question, let's remind ourselves of one very important fact: Instagram is a user's highlight reel. Just because you see a photo of a knitter curled elegantly into a window-side armchair, knitting studiously on a gorgeous project with a decorative mug of steaming coffee by her side doesn't mean she's doing that every day--or even every week, for that matter. What you're missing out on is her daily reality--an exhausted mom who forgot to shower, sipping a chipped mug of coffee she's reheated twice, trying desperately to knit a row or two while her kids watch the same episode of Thomas the Tank Engine they've watched every single day for the last two and a half weeks. You're seeing her best moments, the best photo out of 37 she took of her new shawl, and a photo she edited carefully to make it look just right.
Also keep in mind that maybe you don't need an "aesthetic." If you just want to share photos of your knits with friends, family and knitters who might appreciate them, a lot of editing and filtering probably isn't necessary. But if you want to stand out on Instagram--whether you're a designer, a yarn dyer, or a knitter looking to build a following--outstanding photos are the way to do it. (Well, that and figuring out how to beat the darn algorithm so people actually see your photos, but that's a whole different kettle of fish.)
If you're in the latter camp, this post if for you: today I'm going to give you a few tips for taking photos for Instagram and then should you how I edit them.
Taking Photos
But, you might say, I don't have a fancy camera!
You don't need a fancy camera.
I take 95% of the photos I share on Instagram with my iPhone. In fact, the only photos I don't take with my iPhone are pattern photos--for those, I do use a "fancy" DSLR camera and photo editing software.
But for Instagram, your camera phone is the way to go.
Just, make sure the lens is clean. We carry our phones in our pockets, our kids play with them, we set them on the counter to scroll recipes while cooking--the phone camera lens is exposed to much more dirt and dust than a regular camera, so make sure you wipe if off before you get started.
Use natural light.
Make sure you've got the flash turned off (not auto) and position yourself near a window. Early morning light is lovely if you can catch it. You don't want necessarily want direct sunlight on your project because it can create glare and shadows and wash out your photo, but you do want indirect natural light to light the shot.
Check the background.
Even if your project looks lovely, you probably don't want piles of laundry, kids' toys, or your dog lifting his leg on the sofa in the background of your shot. On the other hand, you might want to add a small plant, a coffee mug, a little notions pouch, or something to add a special touch to the photo.
And what is your project on? If it's lying flat, you want it to be on something that's not distracting from your project. A tablecloth or sheet makes an unfussy backdrop--just make sure it's smooth and wrinkle-free. Can't find anything to use as a backdrop? Buy one. I own 2 of these and I love them.
Ready? OK: take a million photos.
Well, not literally. But take a LOT of photos. Far more than you need, more than any sane person would. Take photos from different angles, from close up, from further away, detail shots, full shots, solo shots, shots of your project modeled and lying flat ... you really can't take too many photos. You want to have lots of photos to choose from so you can pick the one that makes your sweater, shawl, octopus holder, whatever look the best. And it's much simpler and more convenient to take 23 photos and delete 22 than it is to take 4, hate them all, and then have to go back and take more.
Editing Photos
This is a quick overview of how I edit my photos--obviously, other people may edit their photos differently, so consider this just an example.
My first step is to narrow down my photos to the best one. Best is subjective, of course, but you want to slowly whittle them down until you have the 2 or 3 you like the most. Toss the ones that are blurry, washed out, or just unusable for whatever reason. Then look at what's left and see which ones tell the story you want to tell. For example, do you want a photo that shows your whole project, or just a small piece of it? Do you want a close up detail of the stitch patterns, or a larger flat lay that shows your project, your needles, the yarn, and your adorable coffee mug? A number of your photos might be good, but that doesn't mean they're really sharing what you want to share.
Once you've got it narrowed down to a handful, then consider which one is going to be easiest to edit (if you have one you love, but your cat's tail is sticking into it, you really can't work around that), and fits best with your aesthetic. If you have one.
What's an aesthetic? In general terms, it means the overall look of your Instagram feed. Now, maybe not every single photo fits together, but overall, your photos have a cohesive look, whether that's outdoorsy and full of nature, bright and modern, or rustic and homey. Here are a few examples:
Aroha Knits, Francoise Danoy:
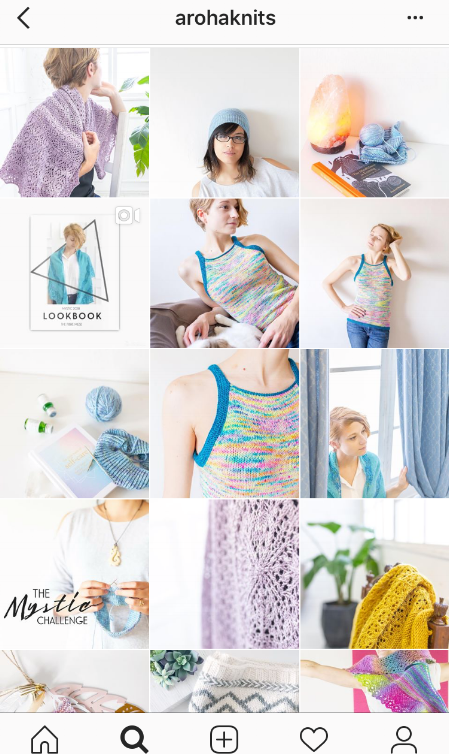
All her photos are brightly lit, minimalist, with pops of color. There's lots of white space, and overall it looks very clean and sparse.
DreaRenee Knits, Andrea Mowry:
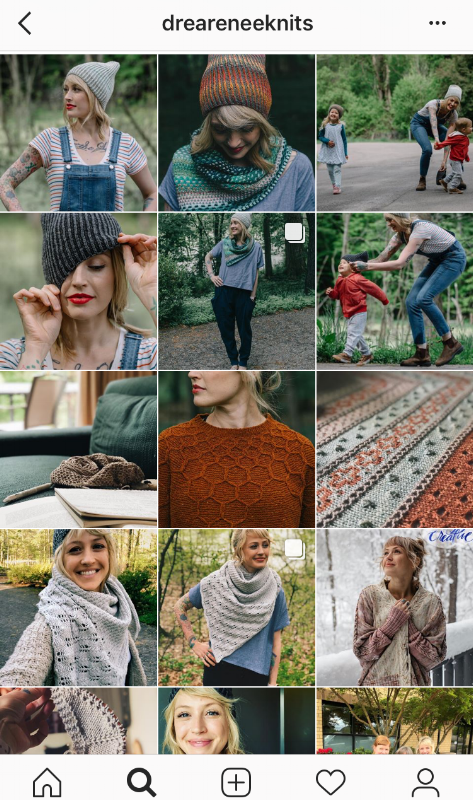
All her photos look warm, a bit rustic, with lots of outdoor shots. In contrast to the Aroha Knits photos, the lighting is dimmer, and the photos are busier.
And here's a shot of my feed:
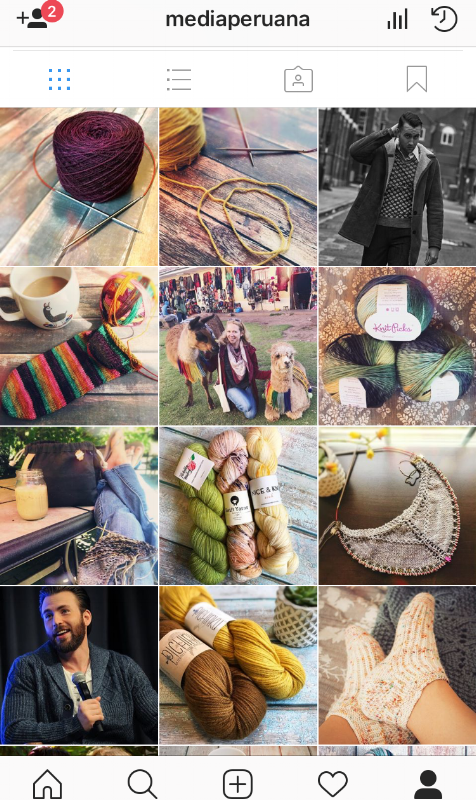
The overall look I'm going for is warm and inviting (and also, hot guys in sweaters). I try to use natural light and warm tones to create photos that look homey and inviting. I consider developing this aesthetic a work in progress.
So once you've determined your aesthetic (or decided you don't need one), you want to edit your photo to fit that aesthetic, or your mood, or the story you're trying to tell.
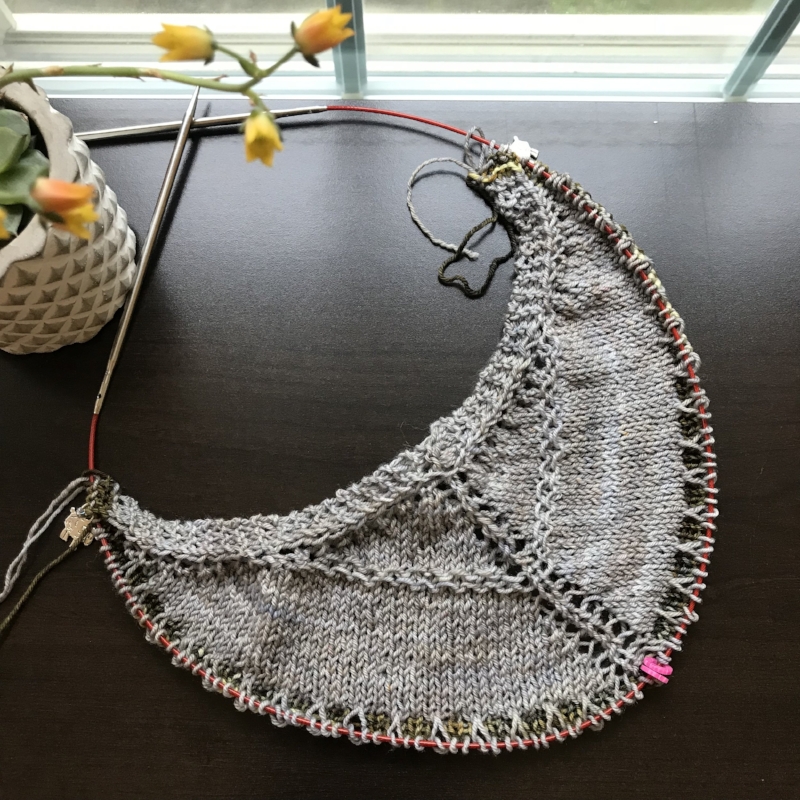
Here's the photo I edited for this post.
I use 2 primary apps to edit my IG photos: Aviary and Afterlight. Both are free, with optional in-app purchases.
Aviary is my first step. I use it to improve and refine the photo--adjust the brightness, saturation, warmth, highlights and shadows.

I will also use Aviary to bump up the sharpness if I want the photo to look extra crisp, and/or change the focus, if I want to give part of the photo that slightly-out-of-focus appearance.

It also has a blemish feature that can take care of an unexpected pimple (WHY did no one ever tell me that you will get wrinkles and pimples at the same time?!?), and whitening, which is helpful if warming up the photo also leads to yellowish teeth.
Then, I take the photo as edited in Aviary and pop it into Afterlight. Afterlight I use to put the finishing touch on the photo by adding a little ambiance. Afterlight actually has many of the same features as Aviary in terms of photo editing, but I find Aviary more intuitive for those aspects (probably just because I started using that app first).
With Afterlight, I add a little texture to the photo with the "dusty" option--it creates the appearance of dust particles, which sounds like something you wouldn't want on your photo (after all, I did tell you to clean your lens) but it's very artfully arranged, subtle dust that just adds a slightly rustic touch.

The other feature I usually use is Light Leak, which creates sunbeams across the photo in a number of different arrangements. This is especially great if the natural light on your photo is a bit washed out or bland, or specific parts of the photo need more light.

Finally, I usually play around with the filters in Afterlight or in Instagram itself, to see if any of them improve the final look of my photo. Most of the time I end up not using a filter; when I do, I never use it at 100% strength, which tends to look a bit overdone and "hey, everyone, I used a filter on this!" But some of the filters, at reduced strength, can bump up the cozy, inviting vibe I'm going for in my feed.
And here's the end result:

And as a special bonus, I created a short video tutorial, demonstrating the entire process of editing a photo, beginning to end!